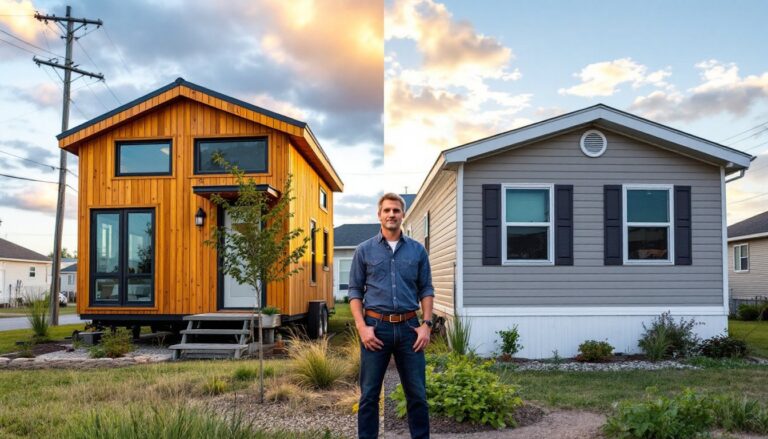

A dedicated home theater room doesn’t need a basement and a six-figure budget. The most rewarding small home theater room builds on the space you have, a spare bedroom, bonus room, or finished corner, and turns it into a place where your family actually wants to gather. Building a small home theater room means making intentional choices about where to put the screen, how sound bounces off walls, and whether people can actually recline in their seats without kicking the opposite wall. This guide walks through the practical decisions that separate a room that feels cramped from one that feels like a proper retreat, handling layout, equipment, acoustics, lighting, and comfort without requiring you to hire a team of installers.
Table of Contents
ToggleKey Takeaways
- A small home theater room works best in a 12-by-16-foot space (or larger) with minimal windows, where you can control lighting and reduce ambient light leakage completely.
- Screen size depends on viewing distance: position yourself 1.5 to 2.5 times the screen diagonal away, making a 55 to 65-inch TV or 90 to 100-inch projected image ideal for standard small rooms.
- Audio quality separates average viewing from true home theater experience—upgrade from built-in TV speakers to at least a soundbar with subwoofer ($300–$800) or a full 5.1 surround system for immersive sound.
- Acoustic treatment using absorption panels on ceilings, walls, and corners transforms muddy dialogue and boomy bass into clear, balanced audio without requiring professional installation.
- Comfortable seating is worth the investment—recliners or sectionals ($1,500–$3,500) should fit through doorways, include proper angle to reduce neck strain, and offer features like cup holders and armrests.
- Lighting control through dimmers, bias LED strips (warm white at 2700K), and blackout curtains creates theater atmosphere while preventing screen glare and eye strain.
Choosing The Right Room And Layout
Start by picking the right room. A space roughly 12 by 16 feet or larger works well for a small home theater room, but you can make do with smaller dimensions if you’re strategic about viewing distance. Darker rooms with fewer windows are ideal, you want to control light completely, and fewer windows mean less light leakage to manage. Basements, spare bedrooms, or interior rooms beat naturally lit spaces.
Measure your space carefully before anything else. Note doorway widths (you need to fit a couch through), ceiling height (needed for projector throw distance if you’re going that route), and any structural elements like load-bearing walls, HVAC ducts, or electrical boxes. These aren’t moving.
For layout, your viewing distance determines screen size. Most professionals recommend sitting about 1.5 to 2.5 times the screen diagonal away for comfortable viewing, too close and you’re turning your head, too far and you can’t read subtitles. In a 12-by-16-foot room, a 55 to 65-inch TV or a 90 to 100-inch projected image works well. Place the screen on the wall opposite the longest sight line, usually at eye level when seated.
The seating wall should face the screen, leaving room for a second row if your room depth allows. Keep 2 to 3 feet of space behind the back row of seating for cable runs, maintenance, and breathing room. If your room is narrower than 10 feet, a single-row theater with angled seating becomes your friend, position seats so people watch at roughly 15 to 25 degrees above center, reducing neck strain.
Essential Audio And Video Equipment Setup
Display And Projection Options
You’re choosing between a TV and a projector. TVs are simpler: mount them on the wall, run HDMI from your source, and you’re watching. They work in any light condition, their brightness handles ambient light, and there’s no maintenance. For rooms up to about 14 feet wide, a 65 to 75-inch 4K TV gives you a cinematic image without the complications. Premium flat-panel displays cost $800 to $3,000+, depending on brightness and panel type.
Projectors create that true theater feel with larger images, a 120-inch screen from a projector costs less than an equivalently sized TV. But projectors need darkness (most home theater projectors produce 2,000–3,000 lumens: ambient light washes them out), they require proper throw distance (the distance from lens to screen), and maintenance (replacing bulbs or cleaning dust filters). Many modern projectors run $1,500 to $5,000. Measure throw distance first: if your room doesn’t have 8–12 feet of throw distance depending on the projector, a TV is your answer.
Visit retailers or watch reviews on sites reviewing home theater systems to compare brightness, contrast, and real-world performance in rooms like yours. Brightness matters more than spec sheets suggest, a dimmer room tolerates a cheaper projector: a brighter room (or one you can’t fully blackout) needs something punchy.
Sound System Considerations
Audio makes the difference between watching and experiencing. A basic setup uses your TV’s built-in speakers, but you’re missing half the impact. A soundbar paired with a subwoofer ($300–$800) transforms dialogue and bass for minimal fuss. A true surround system adds left and right speakers flanking the seating area and surround speakers mounted on the side or rear walls (adds another $400–$1,200).
For small rooms, avoid overkill. A 5.1 system (left, center, right channels, subwoofer, one surround) saturates a 12-by-16-foot room without feeling hollow. Larger rooms or Atmos ambitions (speakers firing sound from above) jump to 7.1 or 9.1, but again, room size matters.
Position the center speaker below or above the screen, dialogue comes from there, and placing it off-axis muddies voices. Surround speakers go 1–2 feet above ear level on the side or rear walls. A subwoofer can live in a corner or anywhere the bass sounds clean: bass frequencies are omnidirectional, so placement is forgiving. Use a sound meter (smartphone apps exist) or your ear to balance levels during setup.
Acoustic Treatment And Sound Control
Hard surfaces bounce sound everywhere, and reflections muddy dialogue and bass. You don’t need a professional anechoic chamber, you need smart absorption.
Assess the problem first. In an empty room, clap once. A long echo tells you sound’s bouncing around. Carpeting, curtains, and furniture absorb midrange and treble: bass is the troublemaker because low frequencies bend around soft materials. Thicker, denser materials work better, rigid fiberglass boards or melamine foam absorb more than thin blankets.
Start with the ceiling: it’s the biggest reflector most people ignore. If you can’t install 2 to 4 inches of acoustic foam, hang heavy velvet curtains or a stretched acoustic panel. Walls behind and beside the seating area should have absorption, especially first-reflection points (where sound bounces off the wall and hits your ear first). Place 2-by-4-foot panels of acoustic foam or rigid fiberglass at ear level and higher, spaced a few feet apart rather than wall-to-wall, which overkills absorption and makes the room feel dead.
Corners trap bass. If bass sounds boomy or muddy at your listening position, place bass traps, thicker absorption, ideally 4 to 6 inches deep, in room corners or behind seating. This helps especially in rectangular rooms under 200 square feet.
Don’t forget the door. Sound leaks under and around door frames. A weatherstripping gasket stops air leaks (and sound leaks). Seal electrical outlets and HVAC vents with caulk or foam gaskets if noise from outside or other rooms is a concern. Mounting your TV on the wall instead of a stand removes vibration transmission to the floor, reducing bass rumble.
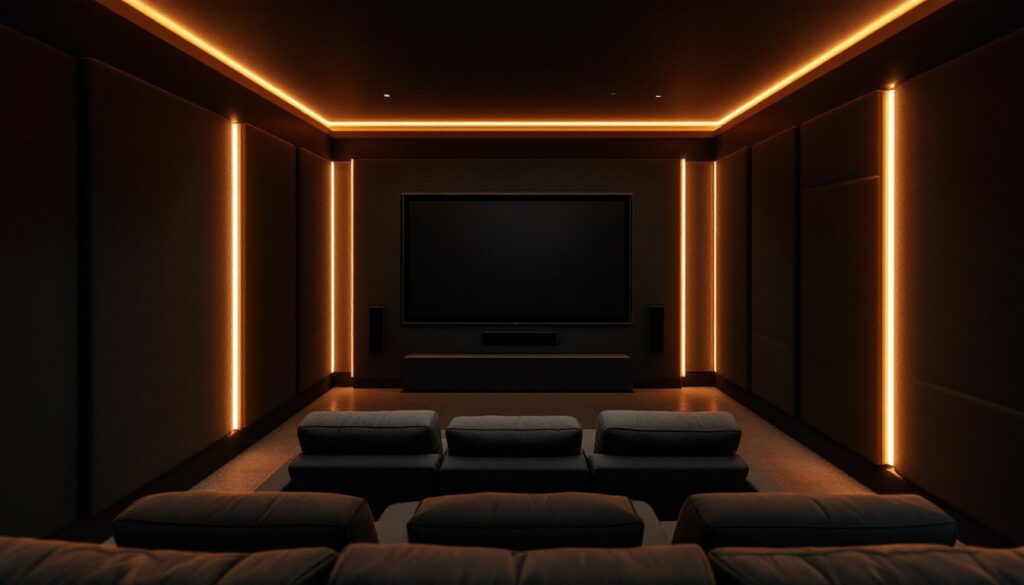
Lighting And Ambiance Design
Lighting makes or breaks a small room’s feel. Overhead lights are your enemy during movies, mount them on a wall switch or dimmer, or skip them entirely and rely on accent lighting.
Bias lighting (LED strips behind the screen or along the rear wall) reduces eye strain during dark scenes and adds theater-like atmosphere without overwhelming the room. Install low-brightness LED strips in warm white (2700K) or warm amber (3000K) behind your TV or along the top rear wall, running at 10–20% brightness during movies. They’re $20–$50 and require minimal installation: peel-and-stick backing, plug into USB or low-voltage power, done.
Wall-mounted sconces or recessed downlights with dimmers let you set mood. Flanking the screen or mounted waist-high on the seating wall gives you control without buying dedicated theater fixtures. Avoid lights that shine toward the screen (glare) or directly toward seating (squinting).
Blackout curtains or panels eliminate ambient light and provide sound absorption in one go. If you’re not willing to fully black out the room, quality blackout roller shades ($100–$300 per window) work: heavy velvet curtains ($200–$500) block light and absorb sound, making them worth the investment. Measure your windows first, cheap plastic panels look cheap in a dedicated room: go with fabric.
Seating Arrangement And Comfort Solutions
Seating is where people spend hours, so invest here. A recline-enabled sofa runs $1,500–$3,500: basic recliners cost $400–$800 each. Measure your doorway and hallways before buying, a 104-inch sectional won’t fit through a 36-inch door, no exceptions. Buy secondhand theater-grade seats from reputable sellers if budget is tight: used reclining seating appears regularly online.
Layout depends on room depth. In a 12-by-16-foot room, a single row of two to three wide recliners or a sectional sofa fits comfortably with viewing distance correct. Angled seating (15–25 degrees above horizontal sightline) reduces neck strain. In deeper rooms, a second row of single seats or a loveseat can sit 3–4 feet back, but don’t crowd, airflow and maintenance access matter.
Riser platforms elevate the back row, improving sightlines and airflow. You can build a simple riser from 2×10 joists, plywood, and carpeting, resting on the floor, no anchoring or permits needed for a low platform. Measure first: the back row should sit high enough that people in front don’t block their view. Usually, 8 to 12 inches of rise suffices.
Cup holders, storage under seats, and good armrests matter more than you’d think. Heated or massaging functions cost extra but increase actual use. In a small room, comfort shortens the distance between “this is nice” and “I never use it”, choose wisely.
Finish with a small side table for remotes and snacks (under $100), and ensure your power outlet and cable runs are accessible from the seating area. Run cables along the wall base or ceiling edge, leaving slack for future changes. Label everything, future-you will thank you.